Procedural Foliage with Blender Geometry Nodes
Enhance environmental design with foliage generation using Blender's Geometry Nodes. This tutorial will demonstrate how effortlessly it can be done!
Geometry nodes is a new feature in Blender that enables the creation of procedural geometry. With this capability, you can generate objects based on mathematical expressions and data. This versatile tool can be utilized to create a diverse range of objects, including foliage.

In this article, we will show you how to create a procedural palm tree with geometry nodes in Blender. We will start by creating a simple trunk, and then we will demonstrate how to add fronds and control the overall appearance.
Crafting the Palm Trunk
The first step is to create a simple trunk, which can be achieved by using a few basic geometry nodes.
- To start, we need to add a Geometry Node modifier to a Curve object in the scene.
- Then we will connect into a resample curve node in order for us to control the density of curves we draw in the scene.
- Next, we can begin to define the density of the curve by utilizing the Set Curve Radius and plugging in the Curve parameter to the input of the node.
- We can now connect this into a Curve to Mesh node and then using a Curve Circle node we can begin to define the density of the “Profile Curve” input parameter.
- For a final step we can add a simple Trunk material and connect the new mesh into the Group Output node to complete a basic trunk assembly.

Adding the Meristem
Having established a simple trunk, our next step is to incorporate the canopy spawn area for the leaves. This will be accomplished by utilizing an Ico Sphere. However, before proceeding, we need to address the task of accurately positioning the sphere at the end of the drawn curve.
- To begin, add an “Instance on Points” node and connect the “Resample Curve” node to the “Points” input parameter.
- Next, we need to add an Ico Sphere node to the graph and connect it to the “Instance” input parameter of the “Instance on Points” node.
- The most magical of all nodes is the “EndPoint Selection” node that we will set the “End Size = 1” to place the root to the tip of the drawn curve.
- The last step for the meristem is beautification using the “Set Material” node and then a “Shade Smooth” node to soften our sphere normals.
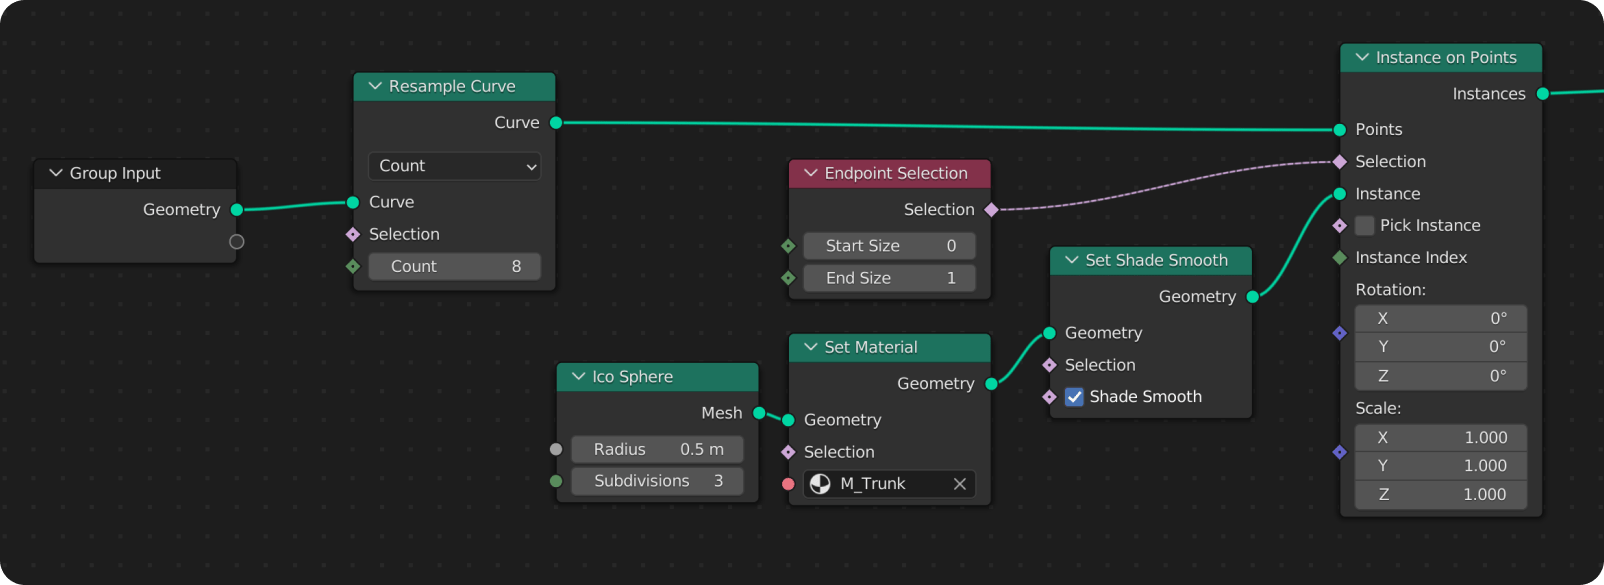
Once we have connected the nodes, we will see that our palm tree now has a canopy root. The leaves will be generated based on the ico sphere we spawned at the tip of our drawn curve.
Draping the Palm Fronds
Now that we have our meristem root, we can begin populating the palm fronds. To add variety, we have provided you with several frond objects from our Air Shipped sample.
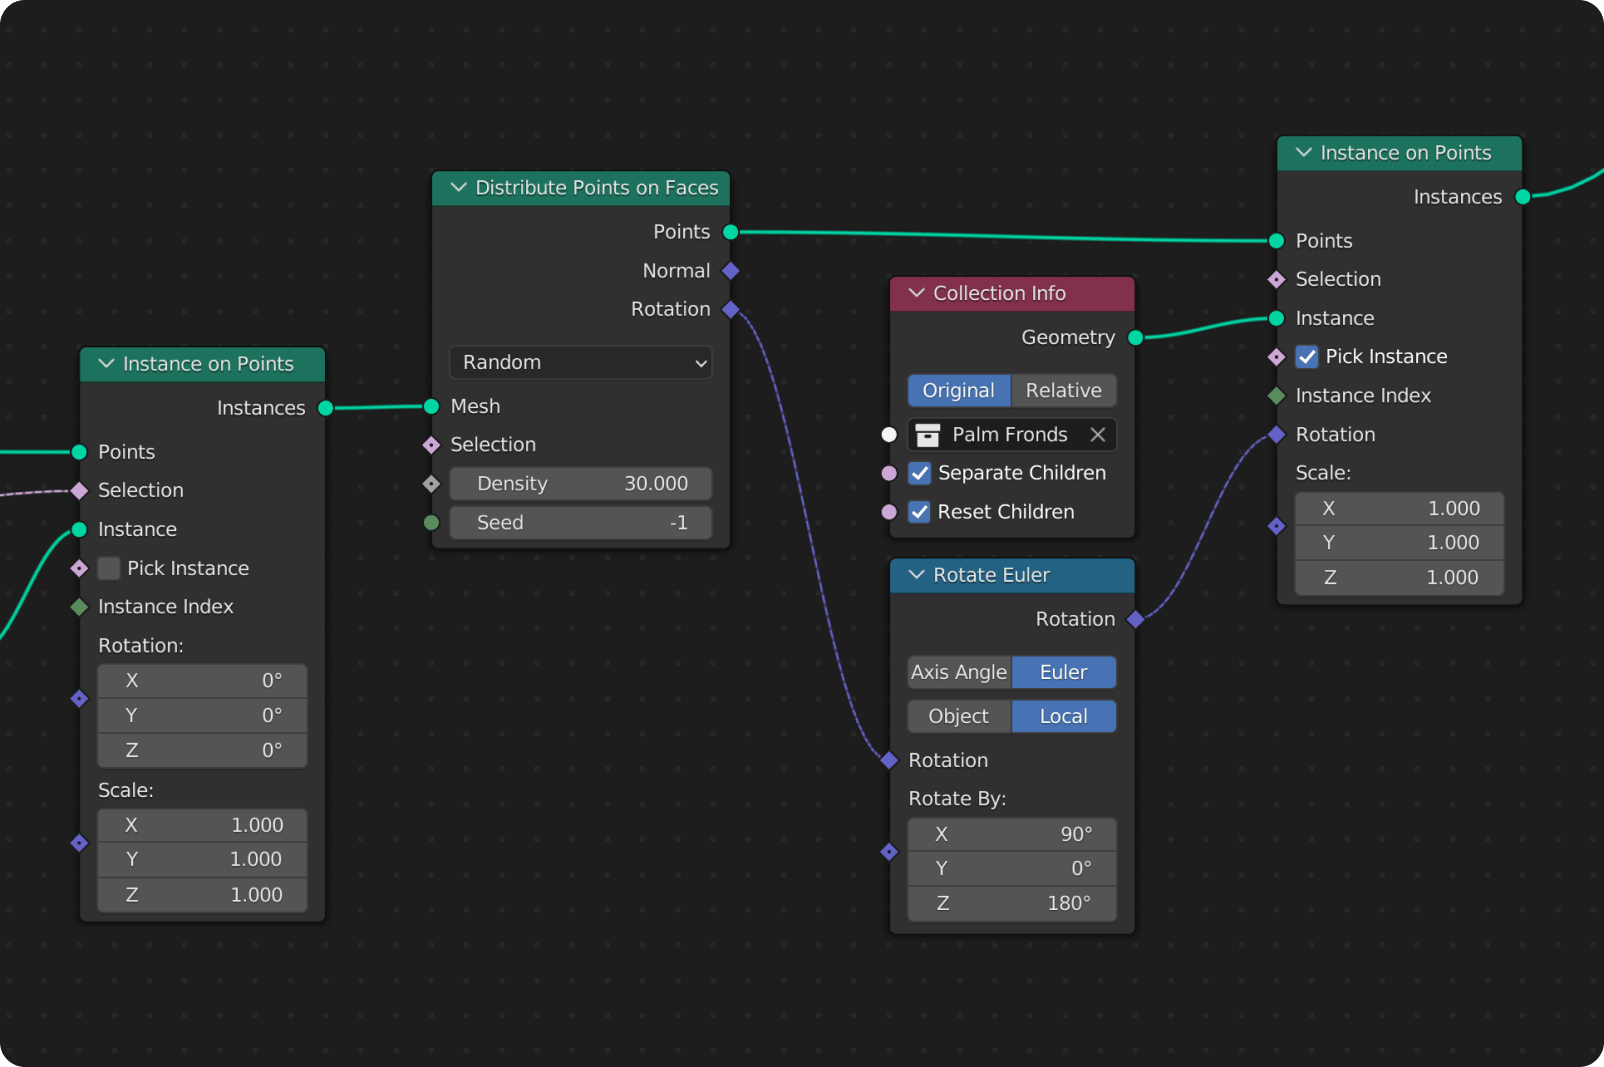
- Adding on to the meristem we created earlier, we will now add a “Distribute Points on Faces” node and connect the Instance output to the Mesh input.
- Next, we can duplicate the previous “Instance on Points” node and connect it to our newly created distributed points.
- With the points now defined, we can add the “Palm Fronds” collection of our fronds within the scene and distribute them randomly on the points connected to the Instance input parameter.
- Our last step for placement will be to use the “Rotate Euler” node to help drape the fronds downward, projecting the tropism that naturally occurs in the wild.
Stitching it Together
We have now individually assembled all the parts of our palm tree and need to begin compositing them together. Not to worry, as this is the easiest part and requires only minimal effort.
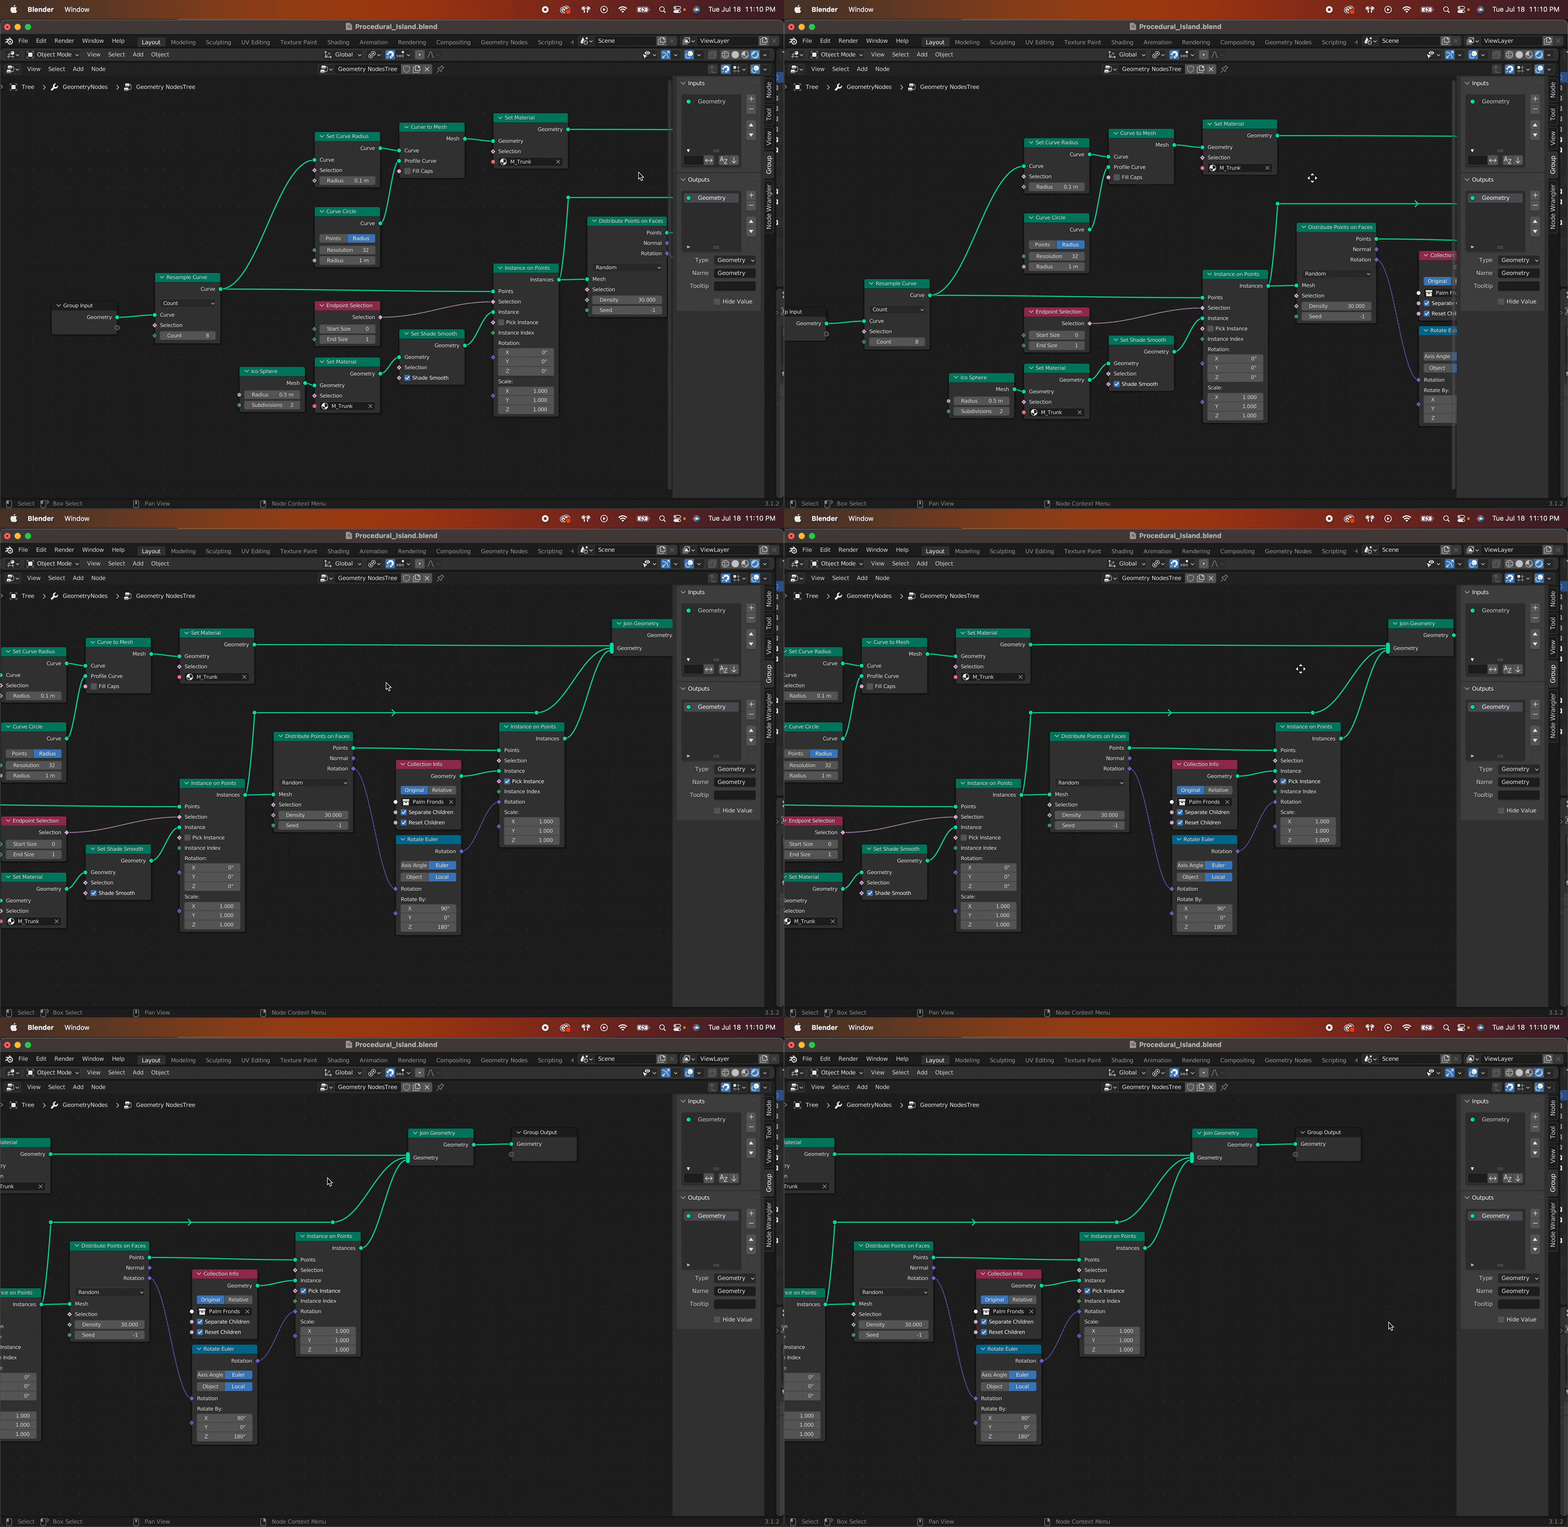
- Our first step is to add a Join Geometry node to the graph and connect it between our Set Material node and our trunk.
- With our trunk now connected, we will proceed by taking the “Instances” output from the previously created “Instance on Points” node for the meristem, and connect it to the “Join Geometry” node.
- Lastly, we can connect the “Instance on Points” node from the fronds to the “Join Geometry” node and see our palm tree completely within our scene.
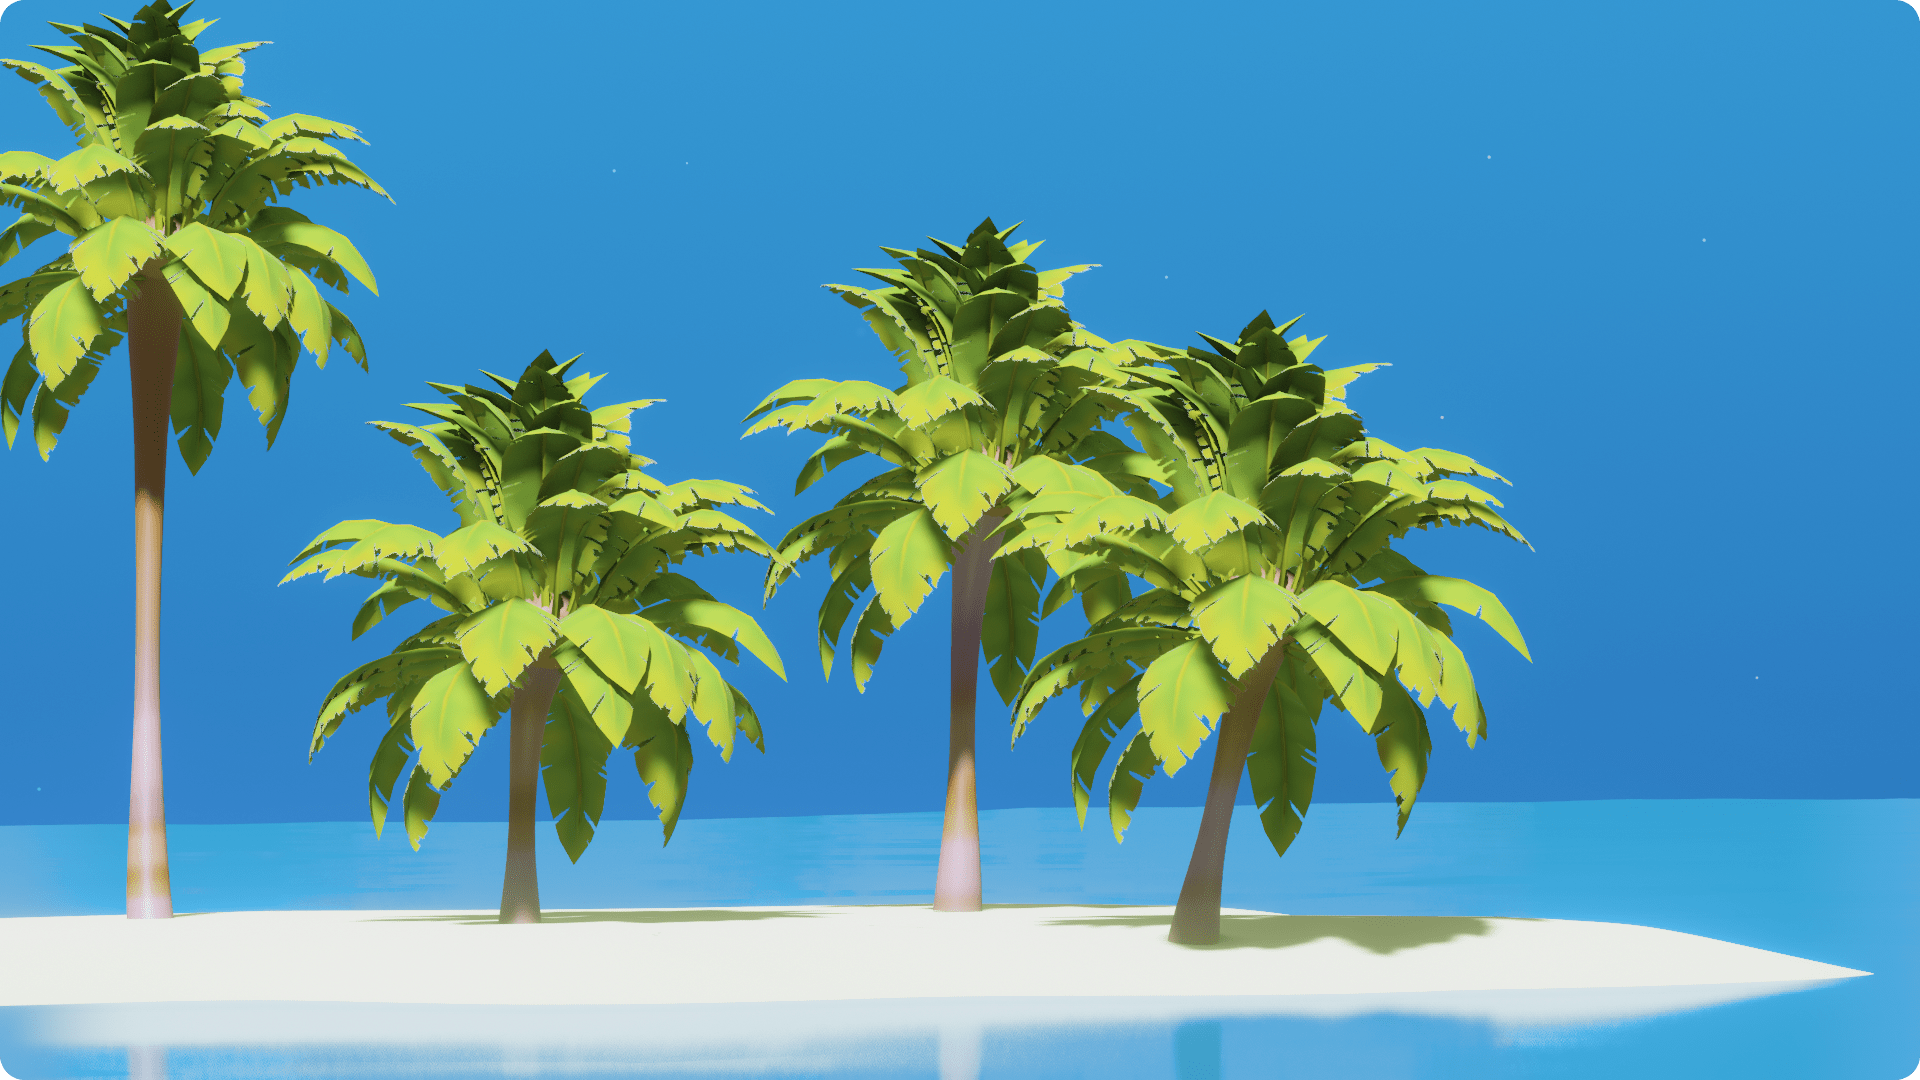
To recap, we showed you just how easy it is to create procedural foliage with geometry nodes in Blender! This type of design is universal, not only for asset creation but also for game design in general. It demonstrates how you can utilize procedural placement of objects based on input parameters. We look forward to showing you more examples in the future, not only for Blender training but also for the procedural placement of objects directly within the Sceneri app!


